Data Nodes
Prerequisites
The N2 Core modules, N2 Data module and the N2 Messaging module must be installed.
If you have not installed the N2 modules yet, please refer to the Quick Start guide.
Complete the Simple Workflow tutorial.
Please refer to the Simple Workflow tutorial to understand the basics for creating N2 workflow.
Contact module is installed.
Retrieving Data
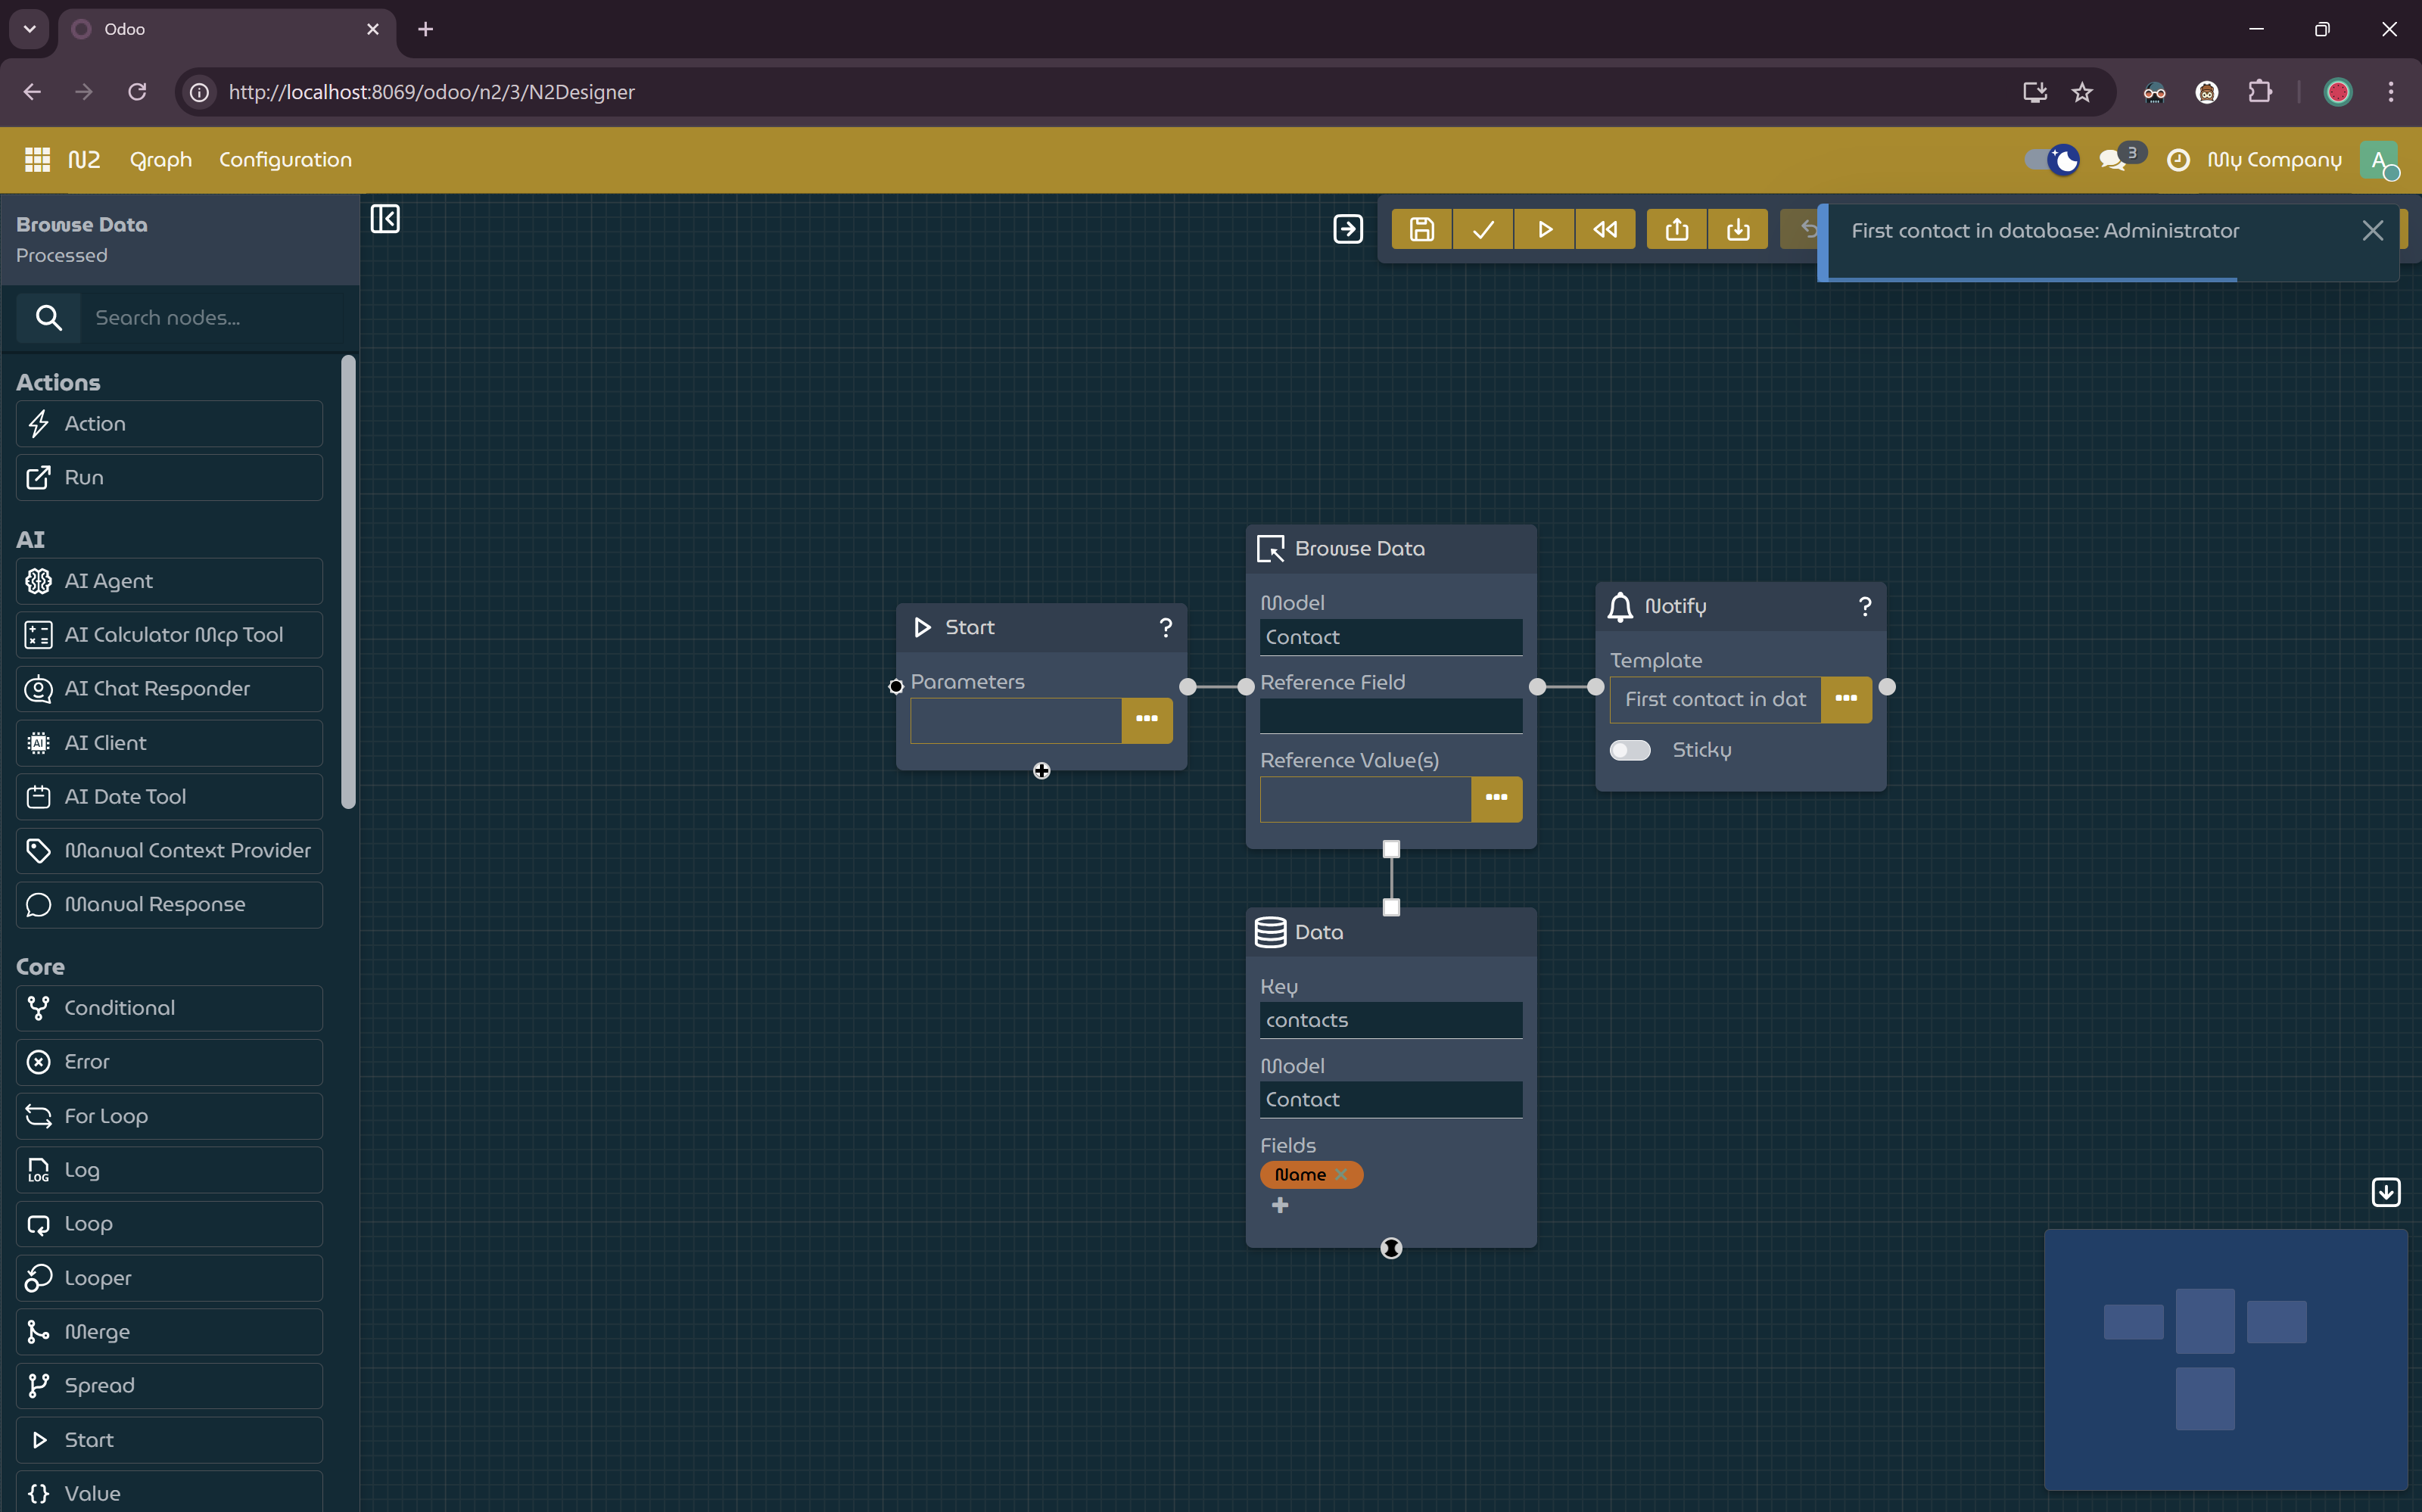
In this section, you will create a simple workflow to retrieve Contact records from the database. Similar with the Simple Workflow tutorial, we will display a message to the user using NotifyNode as a visual cue to indicate that the workflow is working correctly.
This workflow demonstrates how data nodes can be used to query records, extract specific fields, and pass the results to the downstream nodes.
- Create a new graph.
- Add
StartNode,NotifyNode,BrowseDataNode,DataNodeand connect this nodes. - Configure the
BrowseDataNodeto have Contact as it’s model. - Configure the
DataNode:- Set the Key to
contacts. - Add
Nameto the Fields input.
- Set the Key to
- Paste the following into the
NotifyNodeTemplate input dialog: - Save, process and run the graph. A notification should be displayed showing the name of the first contact in your database.
A Message Displaying First Contact Name.
Explanation
sequenceDiagram
participant User as User
participant Workflow as Workflow Engine
participant Start as StartNode
participant Browse as BrowseDataNode
participant Data as DataNode
participant Notify as NotifyNode

User->>Workflow: Run workflow
Workflow->>Start: Start execution
Start->>Browse: Process next node
Browse->>Data: Request Contact records
Data->>Browse: Provide Contact records
Browse->>Notify: Pass Contact records
Notify->>Notify: Evaluate template using contacts
Notify->>User: Display notification with first contact name
Data Nodes
Data nodes allow workflows to retrieve and transform Odoo data and pass the results to downstream nodes as parameters.
These parameters can then be accessed directly by subsequent nodes, such as NotifyNode, for rendering templates or performing actions.
Requesting Data with BrowseDataNode
The BrowseDataNode retrieves records for a specified model and passes the resulting recordset to the next node.
It serves as the entry point for data retrieval but does not modify the data itself.
Retrieving Data with DataNode
The DataNode extracts specific fields from incoming records and exposes the result as a named parameter, defined by the Key.
In this example:
- The extracted contact data is exposed under the parameter name contacts
- Only the name field is included
- Downstream nodes can access contacts directly in their configuration or templates
Next Steps
This example demonstrates basic data retrieval and parameter passing within a workflow. By combining data nodes with trigger nodes and action nodes, you can build more advanced automations such as:
- Conditional logic based on queried data
- Updating or creating records
- Sending notifications or messages based on database state
Refer to the documentation for additional data nodes and configuration options to explore more advanced data operations.