Workflow's Trigger
Prerequisites
The N2 Core modules, N2 Trigger module and the N2 Messaging module must be installed.
If you have not installed the N2 modules yet, please refer to the Quick Start guide.
Complete the Simple Workflow tutorial.
Please refer to the Simple Workflow tutorial to understand the basics for creating N2 workflow.
Contact module is installed.
Responding to Record Creation with OnCreateTriggerNode
In this section, you will create a simple workflow which is triggered when a new Contact is created. Similar with the Simple Workflow tutorial, we’ll also display a message to user with NotifyNode as visual cue to indicate the workflow is working.
- Create a new graph.
- Add
StartNodeandNotifyNodeand connect these nodes. - Add
OnCreateTriggerNodeand connect it to theStartNode. - Configure the nodes
- Set the Model parameter of the
OnCreateTriggerNodeto Contact. - Leave the
StartNodeparameter empty. - Paste the following to
NotifyNodes Template input dialog:
- Set the Model parameter of the
- Save and process the graph. Do not run the graph.
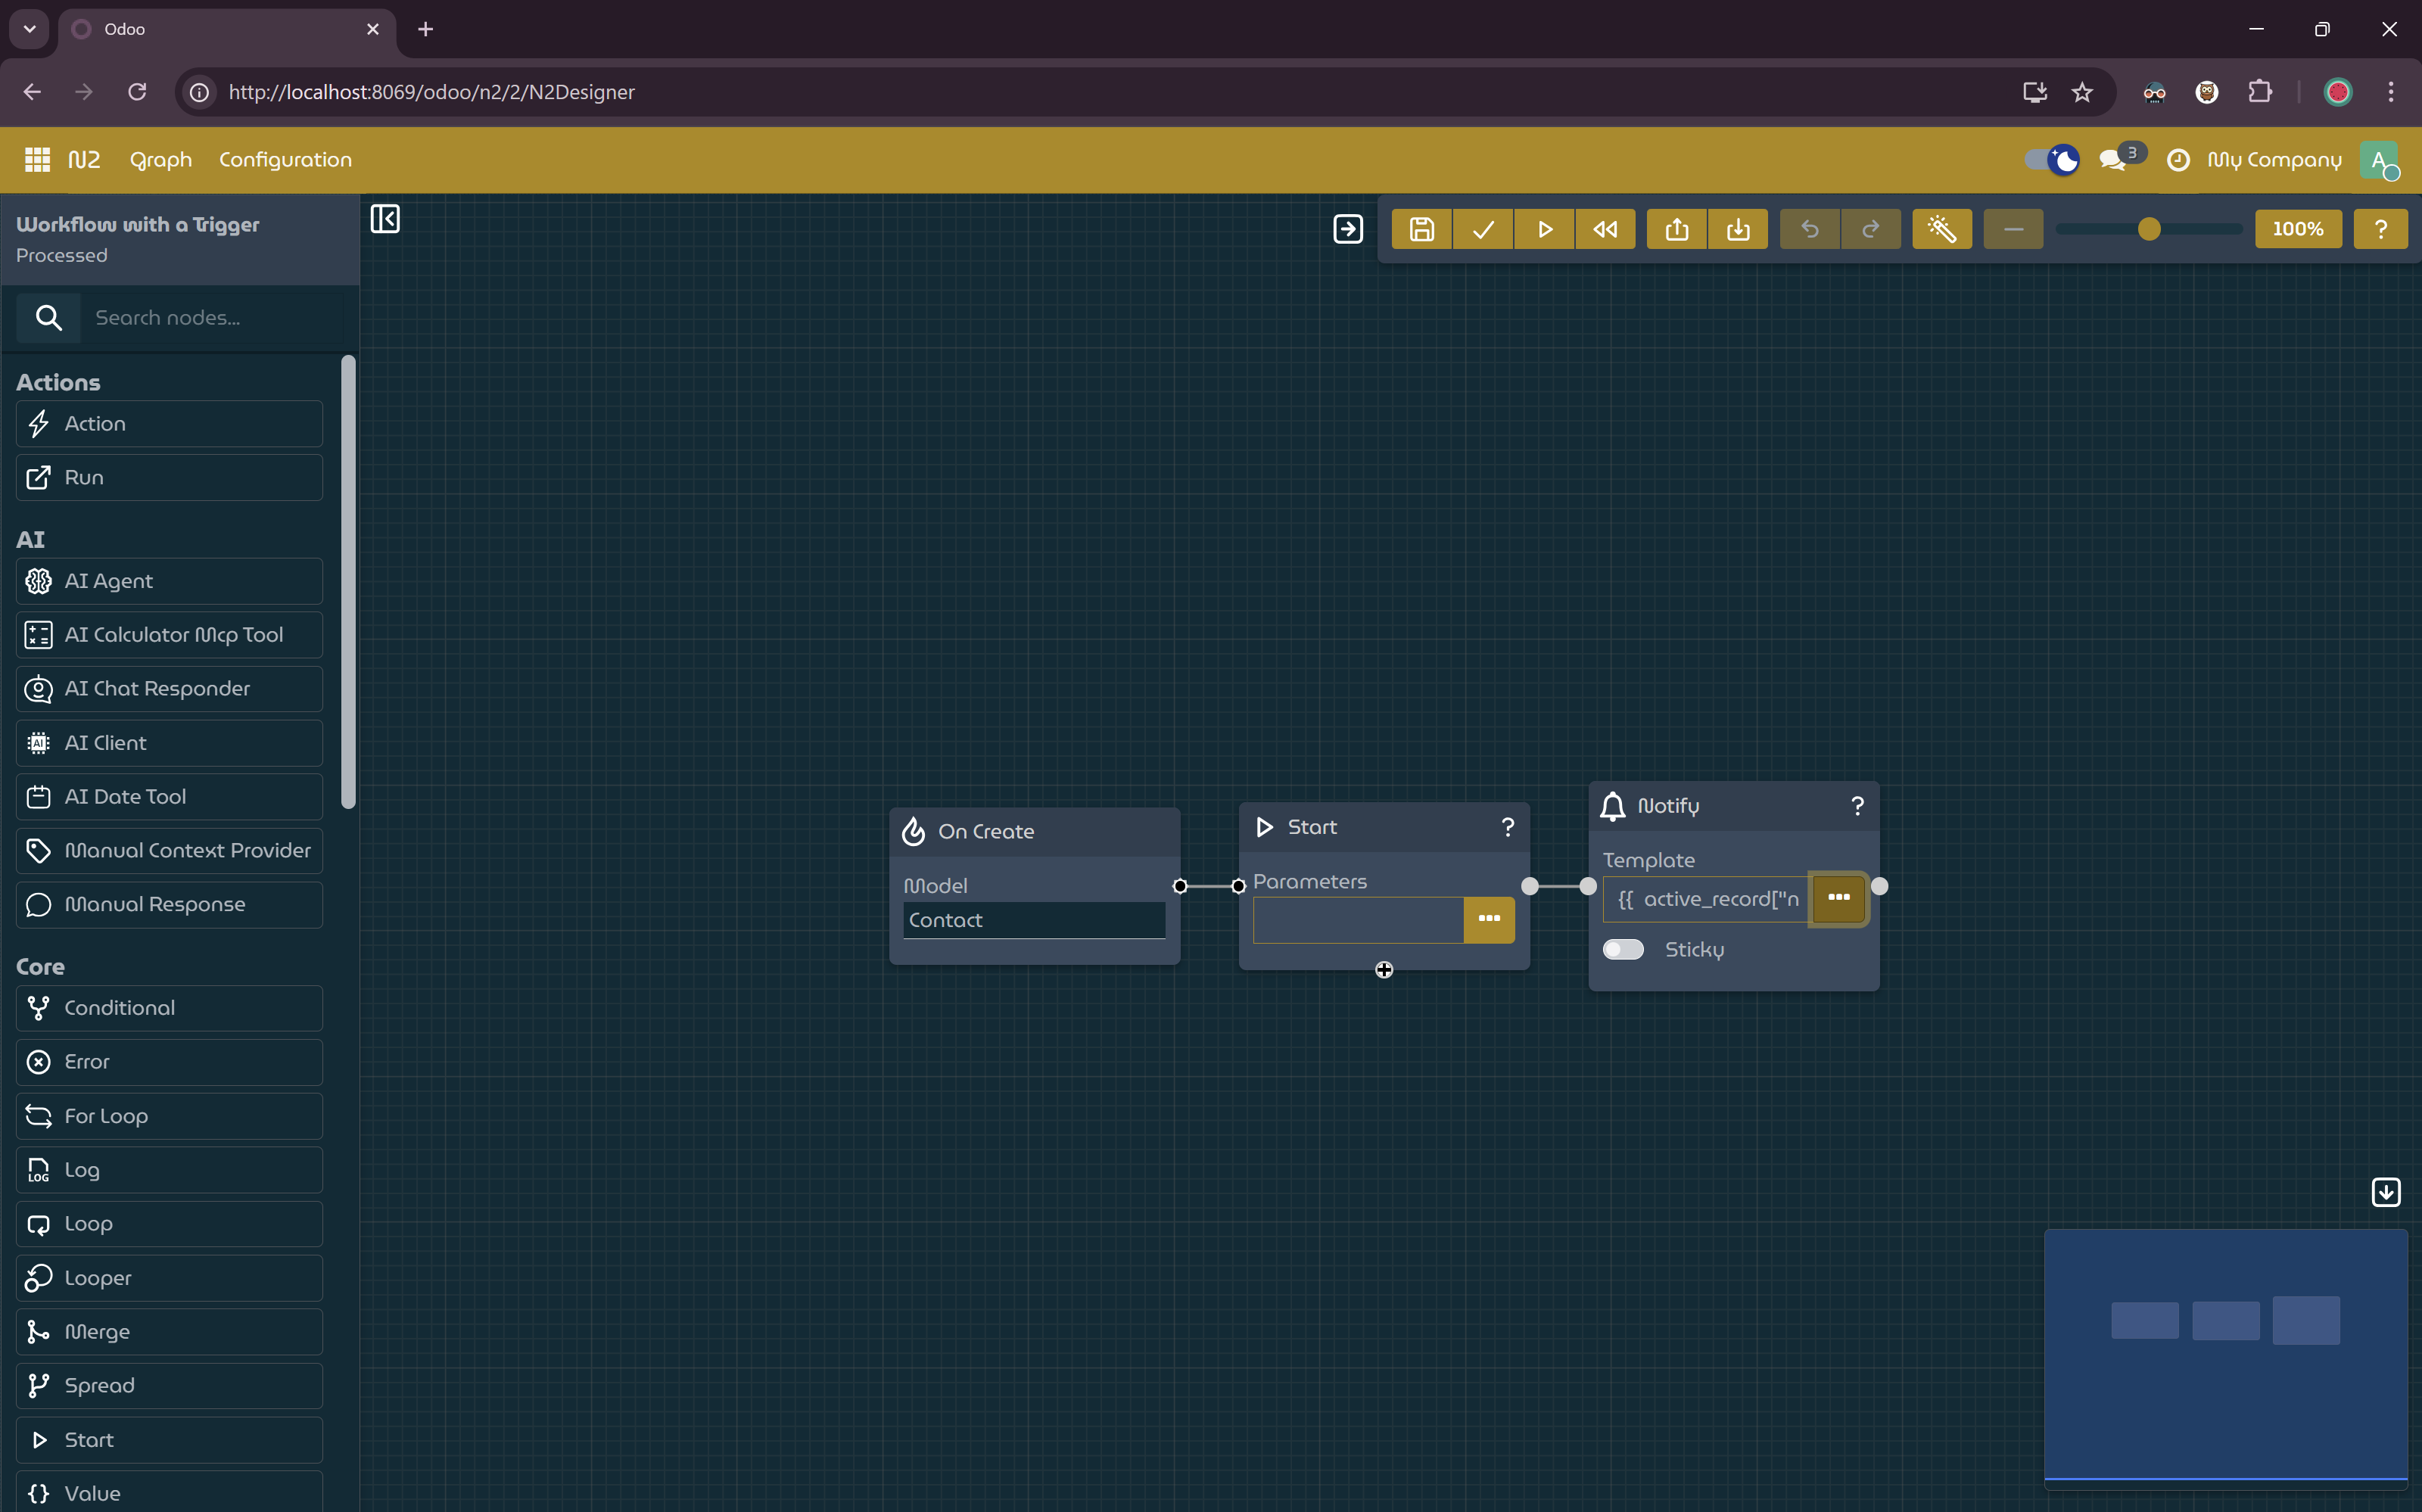
Simple Workflow with Trigger Node
- Create a new Contact, a notification containing the new contact’s name should be displayed when you save the new contact.
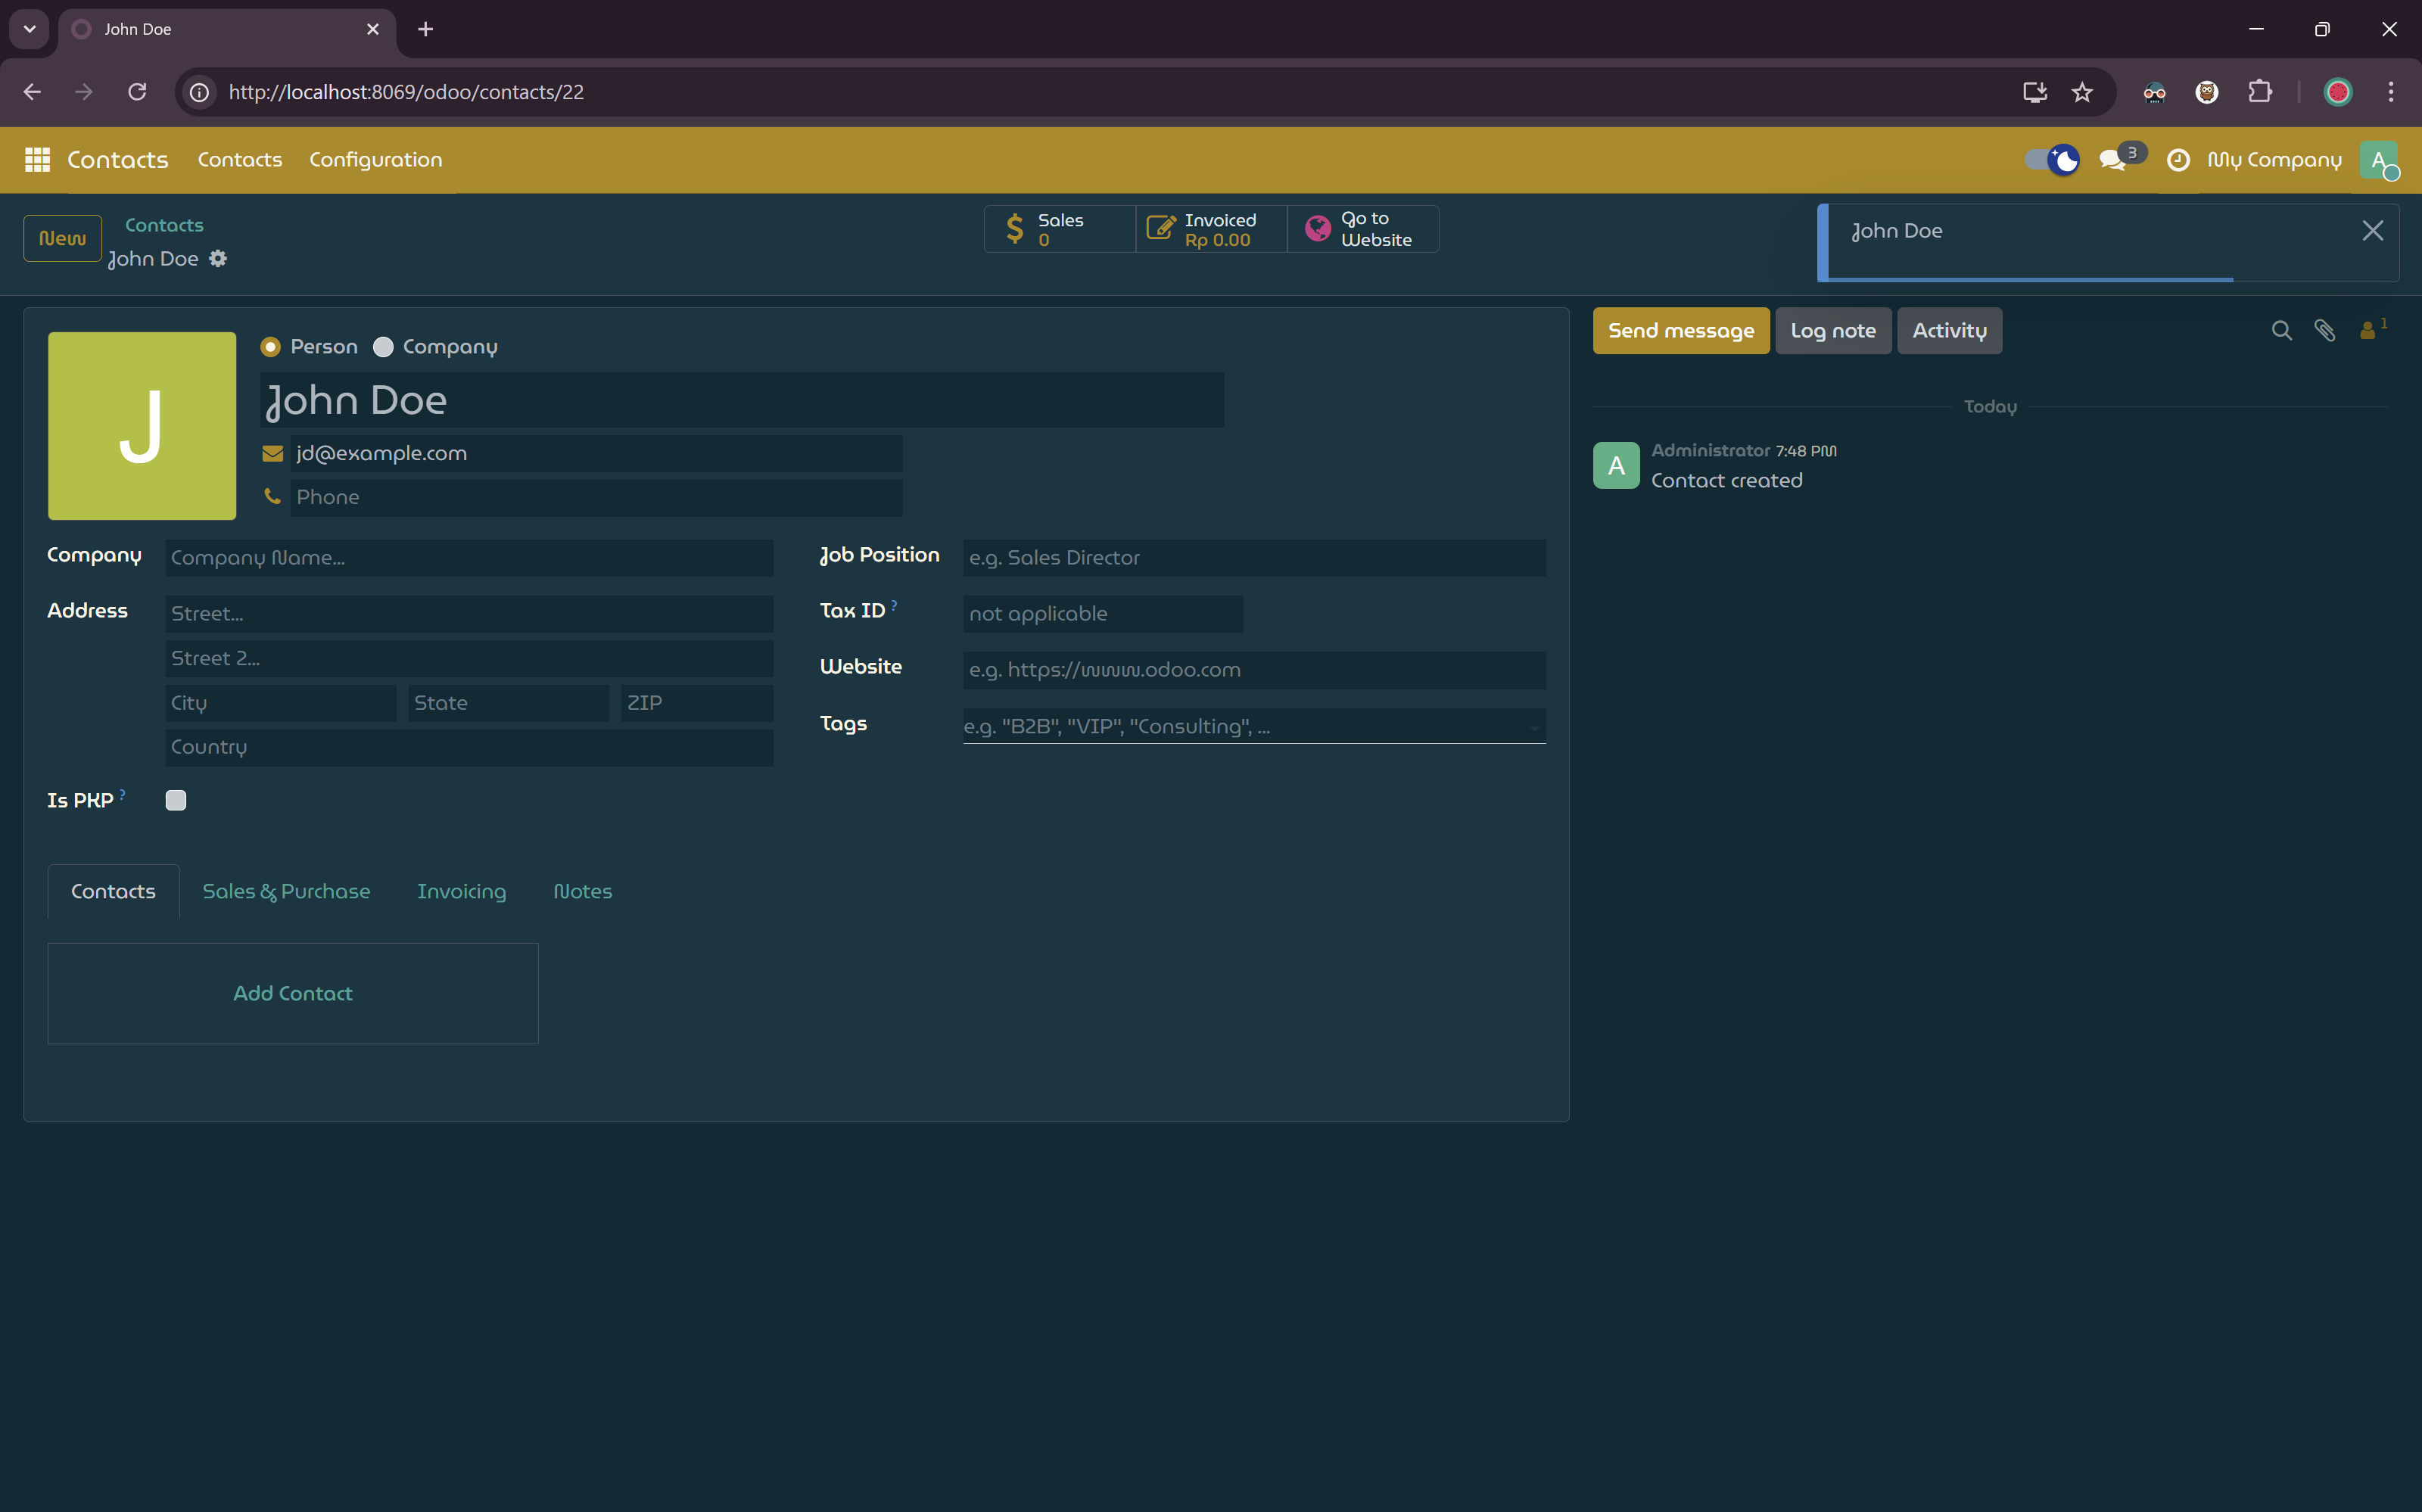
A Message is Displayed when Saving New Contact
Explanation
sequenceDiagram
participant User as User
participant Odoo as Odoo System
participant Trigger as OnCreateTriggerNode
participant Start as StartNode
participant Context as Workflow Context
participant Notify as NotifyNode

User->>Odoo: Create and save new Contact
Odoo->>Trigger: Detect record creation event (model: Contact)
Trigger->>Start: Initiate workflow execution
Start->>Context: Initialize context with active_record
Context->>Notify: Provide execution context
Notify->>Notify: Evaluate template using active_record['name']
Notify->>User: Display notification "New contact created: [Name]"
Trigger Nodes
Trigger nodes allow workflows to run automatically in response to specific events, making N2 a powerful tool for visual automation.
N2 Trigger Module
The N2 Trigger module provides various trigger nodes. This tutorial focuses on record-bound triggers, such as OnCreateTriggerNode.
There are generally two types of triggers:
- Record-bound triggers: Activated by operations on Odoo records (e.g., creation, update, or deletion). These provide additional information to the workflow context about the record that triggered the event.
- Non-record-bound triggers: Activated by other events (e.g., scheduled cron jobs or webhooks). These do not provide an active_record.
Differences from Manual Workflows
Unlike the manual workflows in the Simple Workflow tutorial (started via the StartNode), trigger-based workflows supplement the StartNode with a trigger node as the entry point. The trigger detects events and automatically starts execution, passing relevant data (like active_record) into the context for downstream nodes.
Port Spec
In N2, a port may have a spec, which defines a constraint on port connectivity, allowing it to connect only to other ports with the same spec. Visually, a port’s shape represents its spec, indicating that only ports with matching shapes can be connected.
In the case of trigger nodes, they expose an output port with a dedicated spec, which can connect only to the input port of the StartNode.
Next Steps
This example demonstrates a basic event-driven workflow. By combining different trigger nodes with additional action nodes, you can automate complex processes like sending emails, updating records, or integrating with external systems. Refer to the documentation for specific trigger nodes to explore available events and context variables.