Getting Started
This guide walks you through installing N2, unlocking access, and building your very first graph. You can be fully up and running in just a few minutes.
Quick Start
Follow these steps to install N2 and prepare your Odoo environment.
Log in to GitHub
Ensure you’re signed into the GitHub account you want to use with N2.
Star the Repository
Visit Exploring Odoo at: https://github.com/yonitjio/exploring-odoo
Click the ⭐ Star button (top-right). N2 uses this star to verify access—downloads remain locked until the repo is starred.
Sign in to N2
Go to https://nuido2.skysize.io and click “Continue with GitHub”. Once your GitHub account has starred the repo, N2 automatically unlocks full access to the modules.
Download the N2 Modules
Download both required N2 packages:
- N2 Core Module https://nuido2.skysize.io/shop/n2-3
- N2 User Interface Module https://nuido2.skysize.io/shop/n2-user-interface-4
Note
Both modules are required for N2 to function.
Install the Modules in Odoo
- Extract both ZIP files into your Odoo custom addons directory.
- Activate Developer Mode in Odoo.
- Go to Apps → Update Apps List.
- Search for “N2” and install both:
- N2
- N2 User Interface
Tip
If the N2 modules don’t appear after updating the Apps list, make sure you extracted them to the correct custom addons directory, then restart your Odoo instance.
Once both modules are installed, N2 becomes fully available in your system.
Creating Your First Graph
With N2 installed, you’re ready to build your first graph.
Access the N2 Menu
A new N2 entry now appears in your Odoo main menu.
N2 Menu Location
Open the Graphs List
Click N2 to open the list of available graphs. On a fresh installation, this list will be empty.

Graphs List View
Launch the Designer
Click the Designer button to open the N2 visual editor.
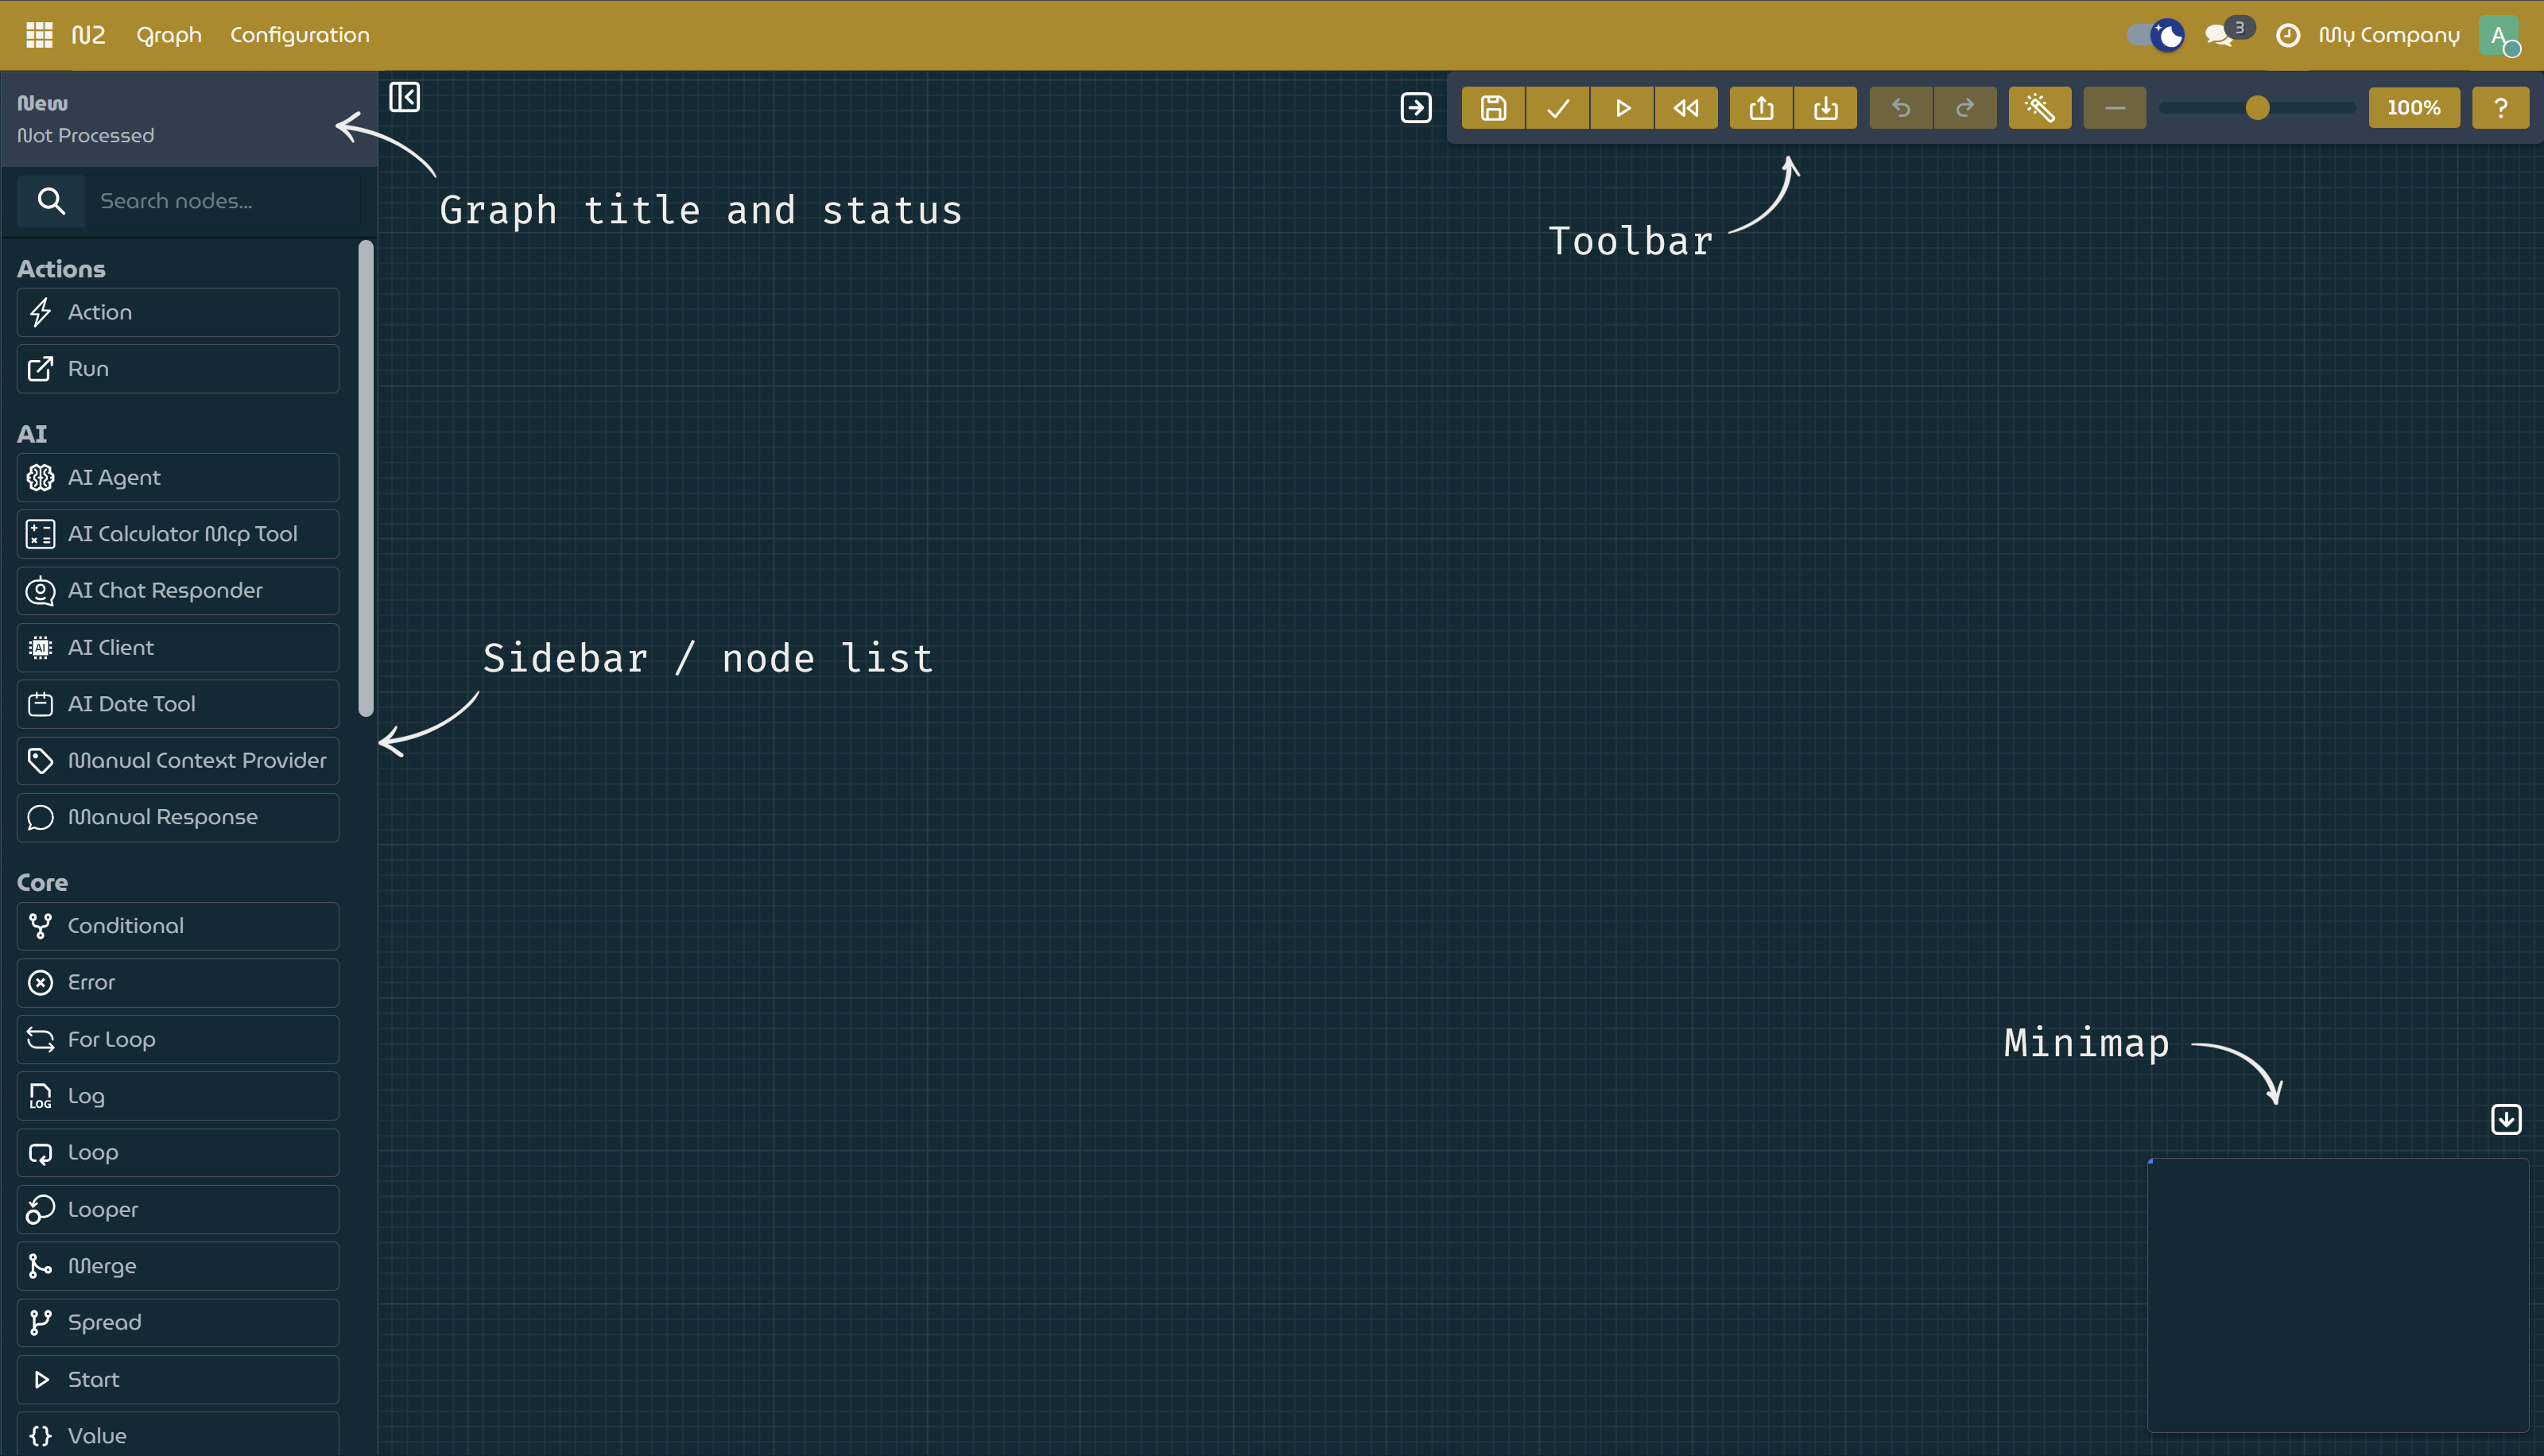
Clean Canvas Ready for Your First Graph
Add a Start Node
- In the left sidebar, type
startin the search field. - Drag StartNode onto the canvas.
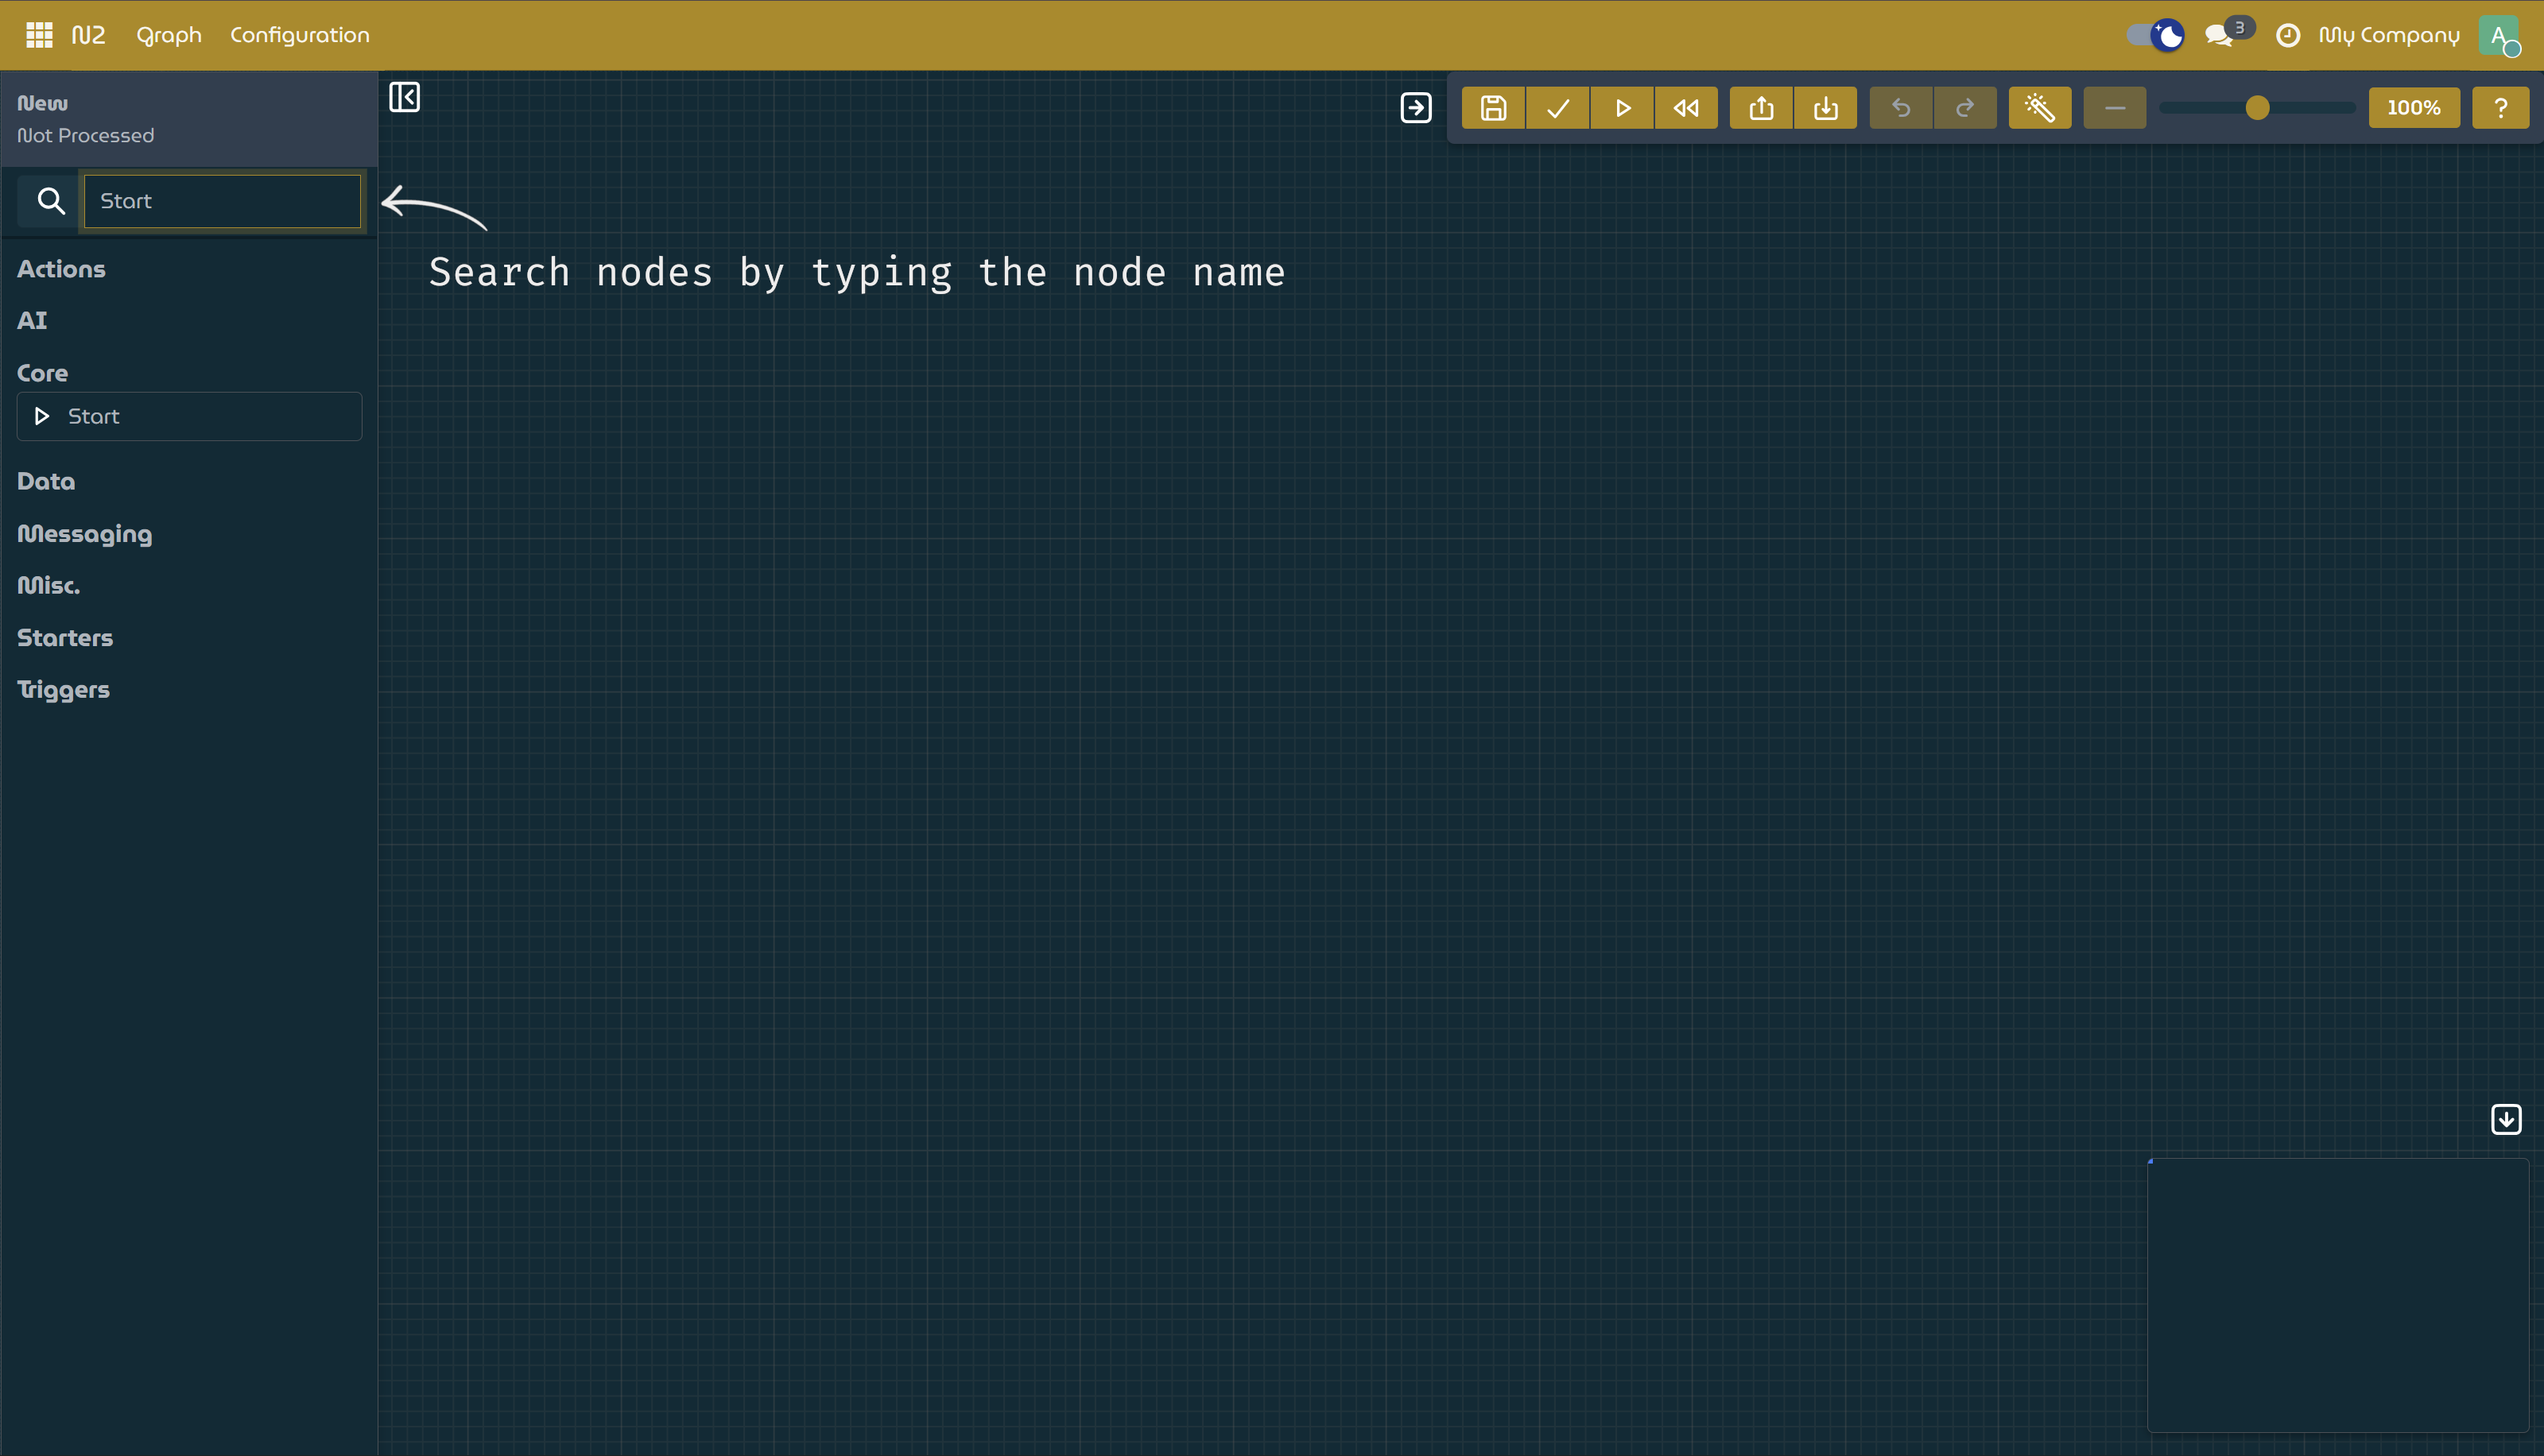
Search Node by Typing on The Search Box
Every executable N2 graph must contain exactly one StartNode—it defines where the execution begins.
- In the left sidebar, type
Save Your Graph
Click
Savebutton on the toolbar, enter a name (e.g., Hello World), and confirm. Your new graph is now stored in Odoo.Process & Run
- Click
Processbutton to validate and compile the graph. - Click
Runbutton to execute it.
A graph with only a StartNode will complete instantly—but you’ve now verified that everything is working.
- Click
🎉 Congratulations!
You’ve successfully installed N2 and created your very first graph. From here, you can begin adding nodes, building logic, and automating workflows with the N2.
You’re off to a great start—happy building!